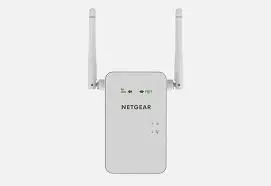
You may get even better coverage and amazing speed with the Netgear EX6920 setup. The range of your present network is extended by these Netgear extenders, which also provide AC dual band wifi at rates of up to 1200 MBPS. The device is discreet and tiny, and it integrates easily into your home network. The two flavours of FastLane technology expand an existing wifi connection to produce a single, extremely fast connection. Any conventional wireless router is compatible with the Netgear EX6920 wifi range extender. It is ideal for playing online games and streaming high-definition video.
Login process | Netgear EX6920
After installation, you can log back into your extender to review and adjust its settings. The steps listed below should help you access your Netgear EX6920.
- Using wifi network management, choose the extender and connect to it on your wifi PC or other device.
- Next, open a browser and enter the default web address for the Netgear extender, mywifiext.net, into the address bar.
- You can access your extender by entering your email address and password.
- Once logged in, you can do a lot of things, including changing the wifi network name, viewing connected devices, looking at wifi settings, and more.
Netgear EX6920 setup | Manual Method
- The Netgear EX6920 should be placed in the same location as the router.
- Your Netgear extender’s button needs to be pressed.
- Your Netgear WiFi gadget should be connected to a power outlet.
- Use a cat6 wire to connect the Netgear extender to the router.
- Mywifiext.net should be entered into the address bar of any open web browser.
- Hit the Enter key.
- Setting up the Netgear EX6920
- Observe the Netgear Genie Setup Wizard’s instructions.
- You can manually setup the Netgear EX6920 using this technique.
- Please get in touch with our team of specialists if you run into any difficulties when configuring your WiFi range extender.
Netgear EX6920 setup | WPS Method
The WiFi Protected Setup (WPS) method expedites the process of connecting wifi and a router. The side panels of the Netgear Ex6920 Extender Setup contain the Product Link WPS button LEDs and Power Button. The installation procedures are as follows:
- Put the wireless router and Netgear range extender in the same space. Connect the power outlet to the range extender.
- See if the power LED light goes completely green. If not, press the power button on the range extender.
- Watch the WPS LED light blink after pressing the WPS button on the Netgear Ex6920 WiFi Extender.
- The WiFi and Extender connection has been properly established when the WPS LED on the Netgear Ex6920 Extender turns green.
- Users will now notice three LED lights on the Netgear Ex6920 Setup (WPS, Power, and WiFi), signifying a successful connection.
- Unplug the extension and move it to a new location; a central location, i.e. in the middle of the office, is advised.
- Reconnect the extension to the power outlet after relocating it to the new location.
- Verify that the LED for the Router Link is green. Relocate the Range Extender if this is the situation.
The Netgear EX6920 configuration without the use of WPS is now complete. You can extend the speed and range of your WiFi at home or at your place of business by following the instructions on mywifiext.net EX6920. Please email us or start a live chat with us if you need help configuring your range extender.
How to update Netgear EX6920 firmware
- Start by logging in to your extender using the procedures described in the last section.
- Your extension will display a “menu” indication when you log in; click on it.
- Select “Firmware update” from the settings menu after that.
- Select the “Check online” and “browse” choices after that.
- Find any newly released firmware updates and install them.
Please keep in mind that firmware has a.chk extension. So that the web interface can read the file, you must first decompress it. Because of this, updating the firmware is simple.
How to Setup a Static IP Address to Netgear Ex6920
Home networks are typically set up using default configurations that connect Extenders using dynamic IP addresses. However, customers should follow these instructions if they prefer a static IP address:
- On the device that is already connected to WiFi, open the web browser.
- In the browser’s address bar, type Mywifiext.net as the URL.
- The Login Page will be displayed, where users must enter their Username and Password.
- Once you’ve logged in, click the “Menu” icon.
- Navigate to “Settings” and click Wireless Settings to access the WiFi Settings Page.
- On this screen, users must select the “IP Address” option.
- Users will select the “Static IP Address” Radio Button and fill out all the necessary fields.
- To preserve all of your changes, click the “Preserve” option at the end.
There is no difference between Mywifiext.net and Mywifiext.local, so if you’re still having problems, check your default login IP address, give us a call at our toll-free number, or chat with us online.